Set your work area
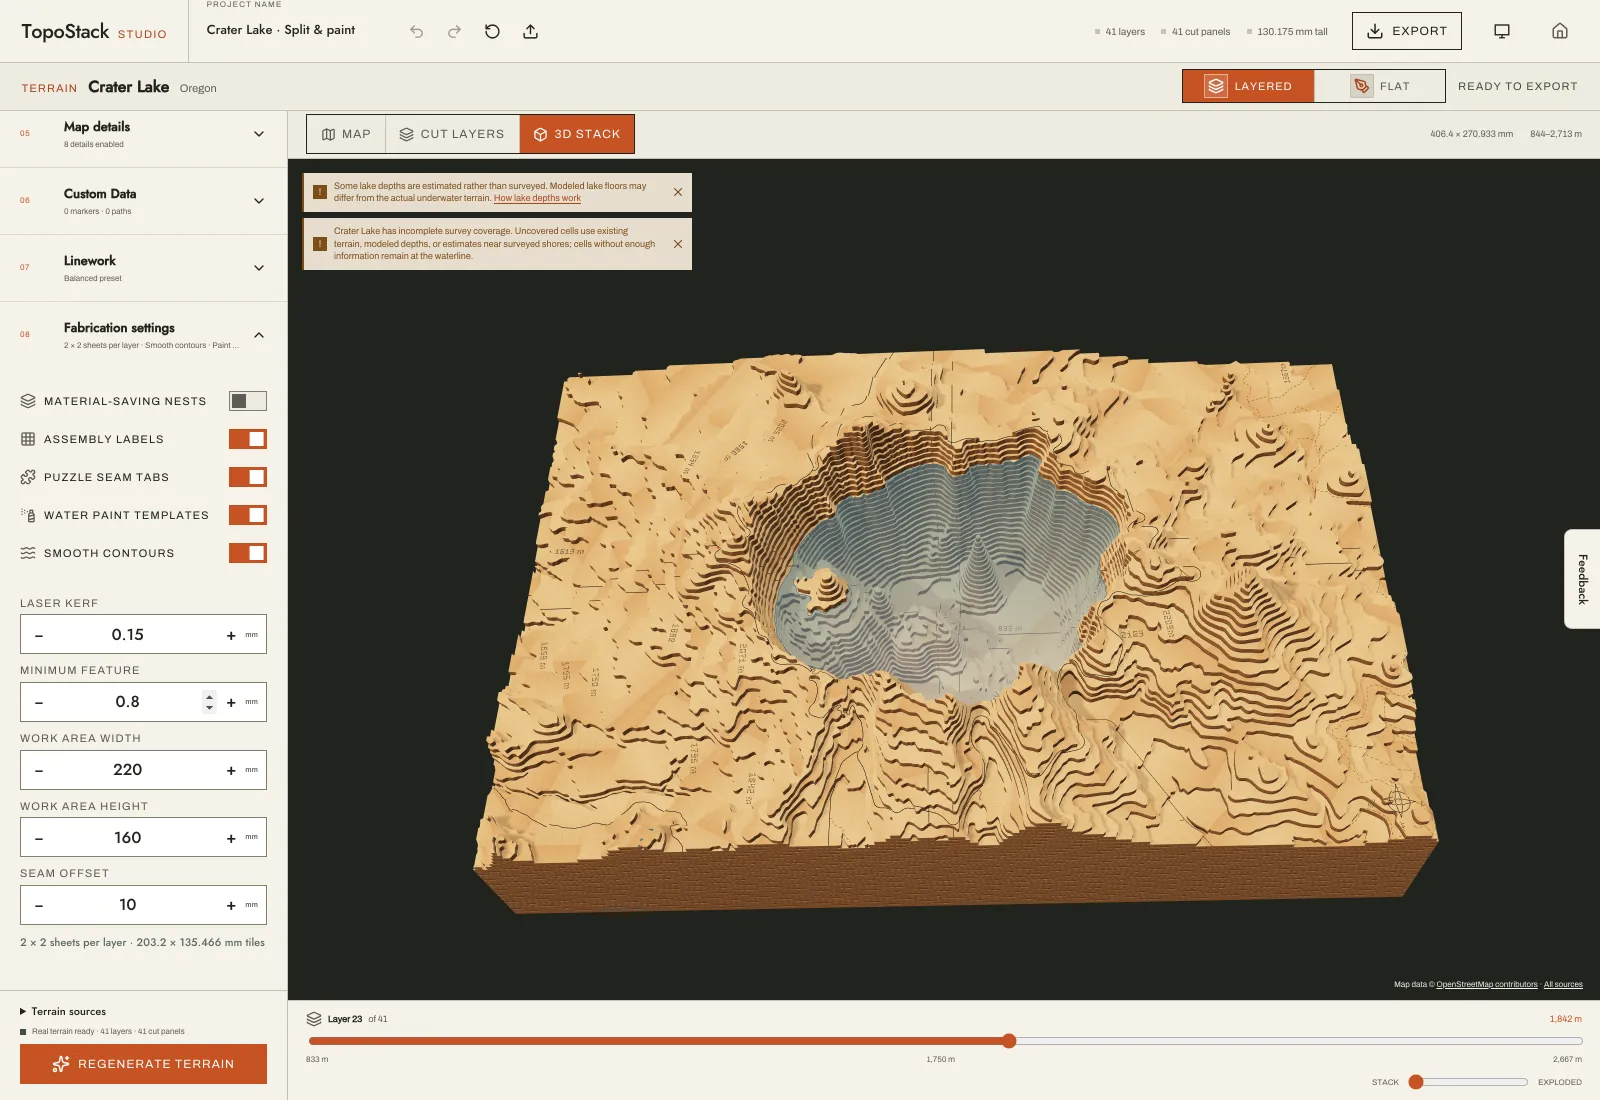
Open Fabrication settings and enter your machine's Work area width and Work area height. Both are 0 (off) by default; 0 on one axis leaves that axis unlimited. Below the fields, the studio reports the result, such as 2 × 2 sheets per layer · 203.2 × 135.466 mm tiles. Regenerate terrain to apply it.
TopoStack divides each layer along a grid of seams into equal tiles that fit the bed, and exports one panel SVG per tile. Every layer gets the same number of tiles. A flat engraving is never split.
Staggered seams
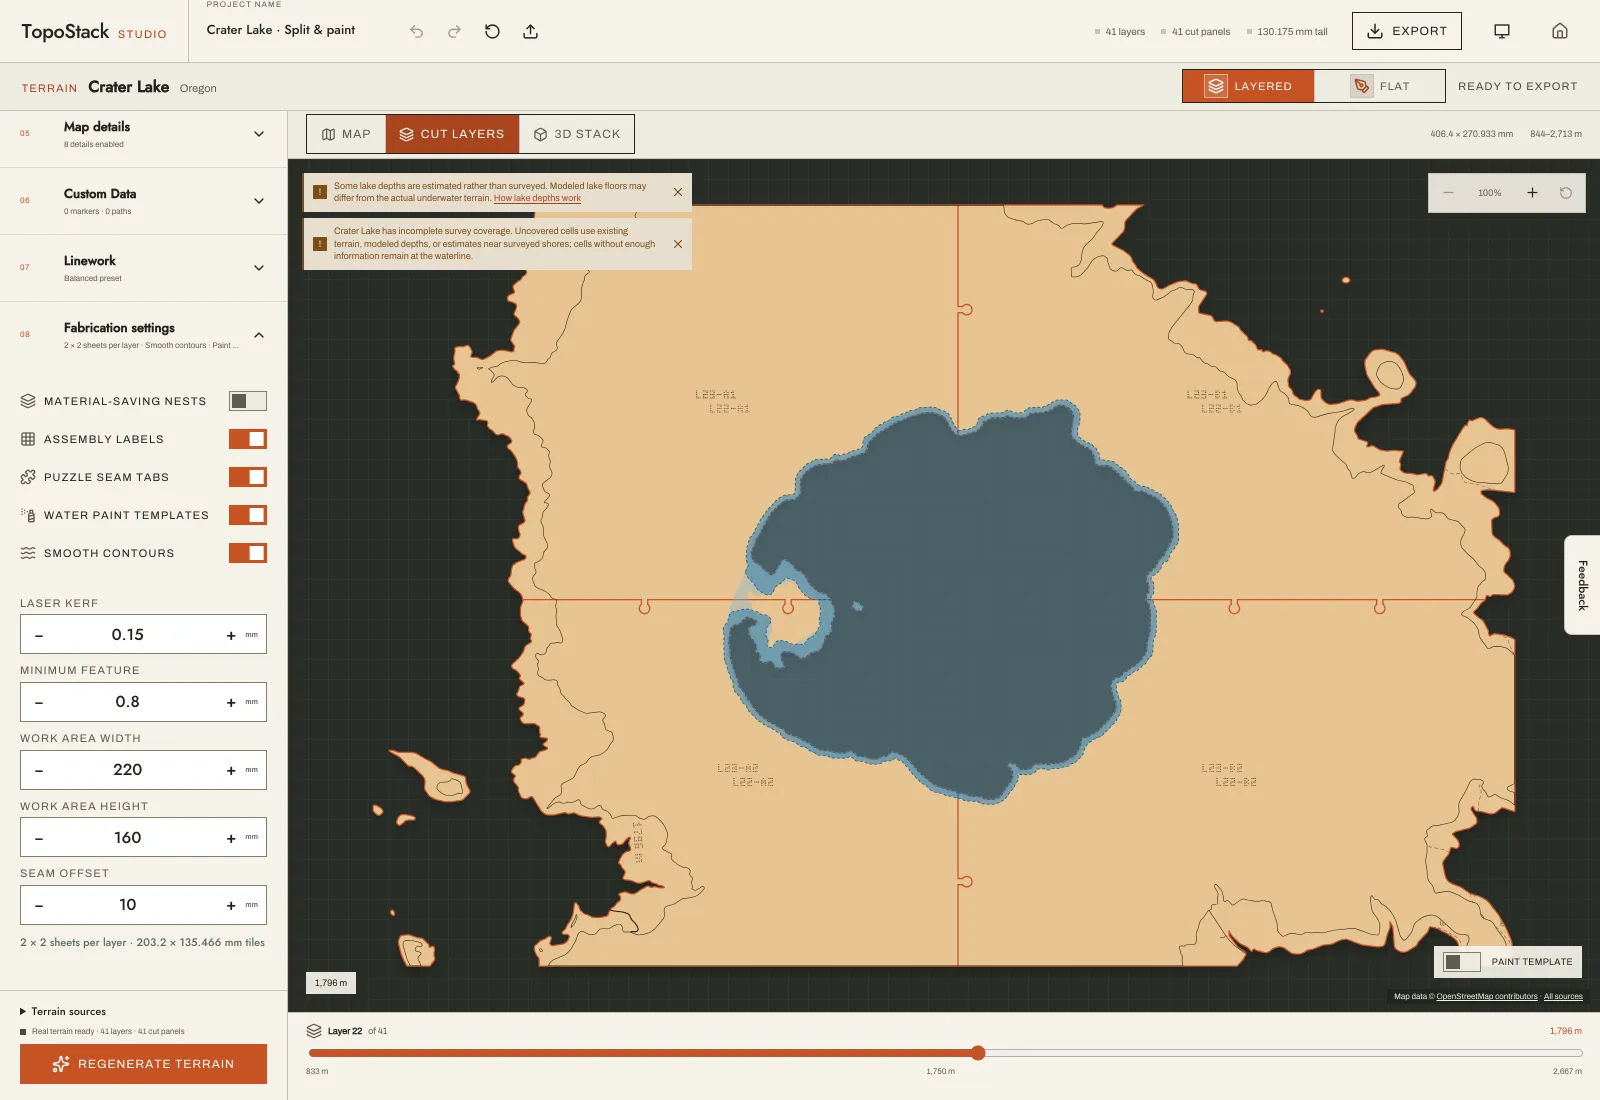
Alternating layers shift their seams by the Seam offset (10 mm by default, 0–50 mm) on both axes. A seam then always sits over solid material in the layers above and below, so the glued stack has no straight crack running through it. With an offset of 0 the seams line up on every layer; back them with a glue strip or a sub-base.
The tiles at each end grow by half the offset to make room for the shift. A model that only just overflows the bed may therefore need one more division than you expect.
Puzzle seam tabs
Where a seam runs under the next layer, it is cut as small interlocking jigsaw tabs, 5 mm deep (4 mm where there is less room). Each piece only fits its true neighbour and locks into line with it; press the tabs home before gluing. Seams that stay visible, on the top layer or an exposed slope, are cut straight. Turn off Puzzle seam tabs for straight seams everywhere.
Assembly ids and file names
With Assembly labels on, each piece engraves its id, such as L03-B2 for layer 03, column B, row 2, on a spot the next layer covers. The ids sit in a separate green (#00A651) ASSEMBLY group, so you can assign that color to Score or skip it. Panel files use the same cell name: my-map-layer-03-b2.svg.
A piece that already fits the bed is never cut just because a seam crosses it. If it reaches past its tile and won't fit beside the tile's other pieces, it ships on its own sheet with a sheet number, as in -b2-2.
Kerf, nests and limits
- Seam edges get the same kerf compensation as every other cut, so pieces butt together at their intended size.
- Splitting usually replaces Material-saving nests, because a nested piece must fit inside a single tile.
- The grid stops at 12 divisions per axis; a warning names any piece still larger than the bed. A split that would make more than 400 pieces across the stack is skipped with a warning. Use a larger work area, a smaller model or thicker material for fewer layers.
Check before you cut
Enter the usable bed size from your laser software, not the machine's nominal size. Cut one split layer as a test before committing the whole stack.
Related guides
Paint the lakes with water paint templates, which follow the same pieces. Follow the layered map guide for the full workflow, see export files for every file name, and check the settings reference for ranges and defaults.