What you need
A browser with an internet connection. To make the piece, add 3.175 mm (1/8 in) sheet material and laser software that can import SVG files.
Recreate the pictured project
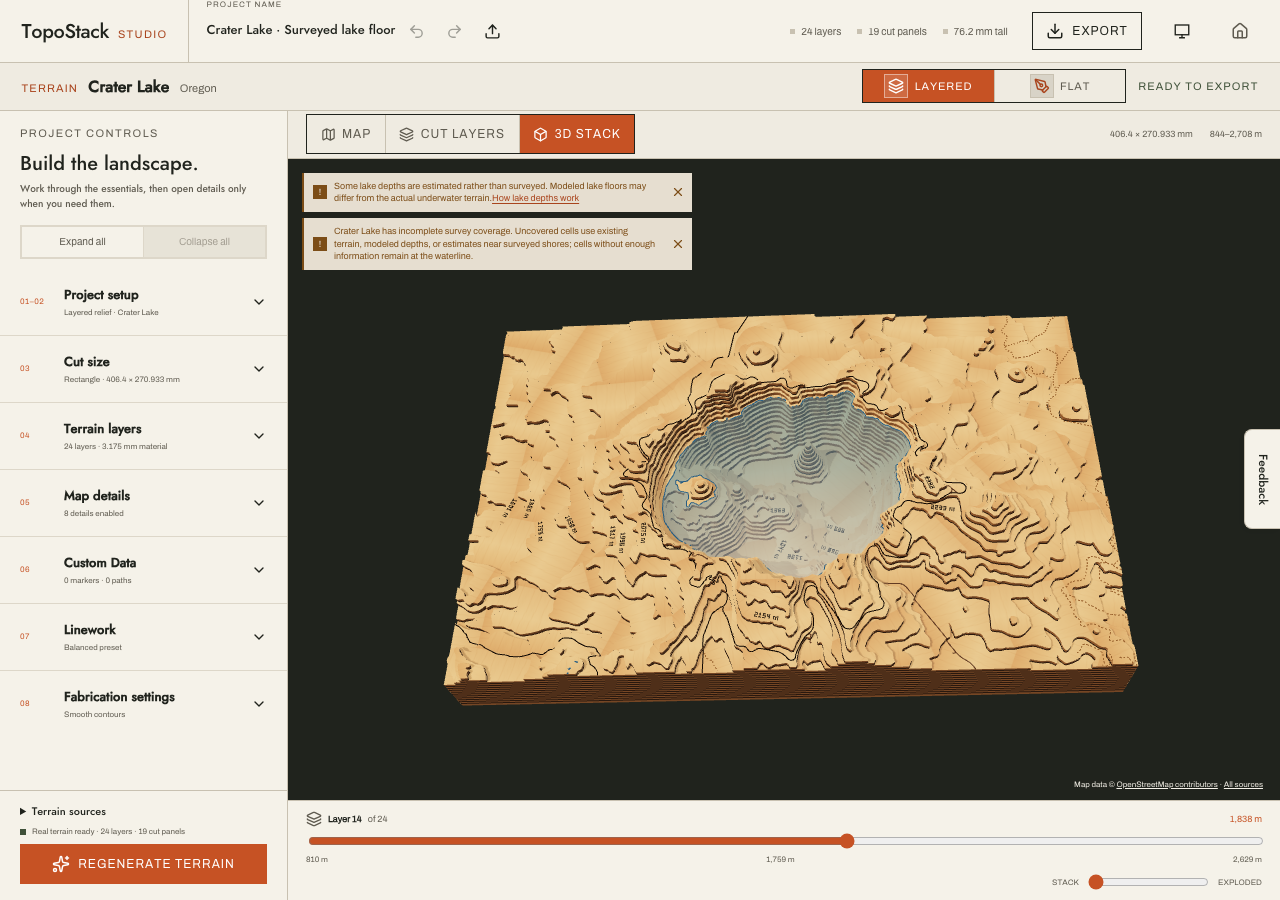
- Open the terrain studio. A new browser starts with the Crater Lake preview. If a saved project opens instead, choose the Crater Lake, Oregon, USA location preset and frame the whole caldera rim on the map.
- Select Layered. In Cut size, choose a rectangle 406.4 mm wide by 270.933 mm high (16 × 10.667 in). In Terrain layers, enter 3.175 mm sheet material.
- Set Vertical exaggeration to 4×. The studio rounds the relief to whole material layers without an upper layer limit. The pictured project uses 24 layers; different framing, thickness or data can change the count.
- In Map details, keep Water depth on, set Depth exaggeration to 1.75× and leave Limit depth layers off for automatic coverage. Choose roads, water and other details, then select Generate terrain.
- Inspect the layers and the exploded 3D view, then open Export, download the complete project and read its assembly guide.
Your result can differ from the picture. Choosing the preset centers the map on Crater Lake but does not reproduce the pictured map area, and it does not reset a saved project's other settings. Check the output type, size, material thickness and map details explicitly. Different framing, fresh data or different settings change the layer and panel counts.
Understand the lake
The surrounding terrain uses real elevation data. With water depth on, Crater Lake uses the integrated USGS lake-floor survey where available; uncovered areas use existing terrain or modeled depths. The lake depth directory lists every integrated survey.
Automatic depth coverage adds the sheets needed for the requested depth without reducing land relief. If you enable Limit depth layers, fitting compresses lakes into that allowance. Use manual depth turns fitting off; with a limit still enabled, deeper floors can be flattened. Turn the limit off to return to automatic coverage. Learn how depth settings affect layers.
Try the same place as an engraving
Switch to Flat for a single surface. Adjust contour density and index lines, choose the details you want, then generate and inspect the flat preview. Follow the engraving guide for the SVG output and import checks.
Next steps
Download the project-settings JSON as a record of your chosen area and controls, and keep ATTRIBUTION.txt and the README with the artwork. Follow the layered map guide to import, cut and assemble the pieces.